Secrets
Shareware Episode
Enter The Wang
| Level 01 - Seppuku Station (6 secrets) |

-
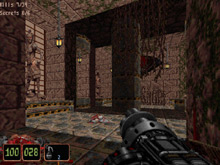
At the start you are in the dojo, look through the locked doors and you will see a gong. Throw a shuriken at it and turn around facing the picture on the wall. You will see it open. Jump in and grab the goodies.
-
When you come out of the dojo turn left and go down the steps. Jump up on the crates by the gold key and you will have a window on your left and straight ahead of you across the way. Get on the ledge by the window on your left and run and jump to the ledge under the window across the way. Go through this window to find a red room.
-
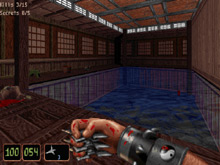
Go through the gold key door and on your right will be a garbage can. Shoot the garbage can into to the corner of the wall with the door that leads to the water pool. Jump on the garbage can and open this wall. Jump up to get the goodies.
-
In the room where you find the soup cooking, there is a wall of whitish tiles. Open the ones on the right end of the wall to get find the secret.
-
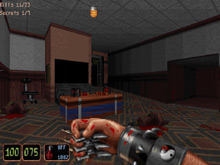
In the pachinko parlor where you get the silver key off of the slot car, there is a thinner machine in a corner. Push it, and turn around. The turning object opens for this secret.
-
Leave the pachinko parlor, up the ramp and turn go around to your left. You will find another wall of whitish tiles with one lighter one. Push it and go back towards the top of the ramp and you will see this secret door is open (timed).
|
| Level 02 - Zilla Construction (7 secrets) |

-
After you have opened the door with the bathroom switch go into the second room and open the picture on the wall. Hit the switch and turn around to find the secret panel opened on the dark gray wall.
-
Shoot the vent in the hallway off this room to find this secret.
-
With the aid of the repair kit, drive the forklift to the right and you will see some stuff on top of the metal wall. Jump on top of the upper part of the fortlift. Then onto the metal wall to find this secret.
-
Locate the crane within the crate area (beyond the blue door). Climb the ladder and jump to the crates. Next, jump to the right part of the crane. Now with the wall at your back, turn a little to your left and jump on the crate with the goodies for this secret.
-
Outside the blue access door are some crates to your right. Push on the closest one to find the goodies here.
-
To the left of the gold access door is a control panel. Open it to find the secret.
-
As you start to come down the ramp in the power plant, turn to your left and jump onto the platform. Turn to your right and jump across to the ledge with a control panel. Open it to find this secret.
|
| Level 03 - Master Leep's Temple (8 secrets) |

-
After you go through the big door you will find Master Leep's throne. Blow the ceiling above it and jump up through the hole to get some goodies.
-
In the room where you get the key from the upside down guy, jump on the crates by the water. Open the picture to find this secret.
-
Jump into the water and swim to the other side. Go up to the waterfall and jump up on the water. Go down in the water to find some goodies.
-
While still in the water in the third secret, shoot the switch through the grate. Come out of the water and run through the big doors. Turn right and jump up on the crates. A door should be opened (timed) for this secret.
-
While standing on the rotating pillar in the lava room, shoot the switch on the wall. A small door (timed) will open on the small ledge. Jump to it to get the secret.
-
After you have jumped on the upper ledge and blown the ceiling out, climb up to find a bunny rabbit. Follow him off the side of the cliff (maybe a little to the right). You should land in a pool of water. Go into the cave to find this secret. By jumping through the picture in the left passage, this takes you straight to Master Leep.
-
After riding a platform in the lava, you enter a hallway. The ceiling starts to drop down on you. Shoot the panel through the barred door. When the barred door opens jump through the panel to find this secret.
-
After you have opened all of the lava windows a door will open under the water. Go back into the hallway with the crushing ceiling. A door should be opened on your left that leads to this secret.
Note: If you have not step on any of the buttons on the floor for the lava doors, Here is the order to do it in. You are standing in the back of the room. On your left step on the middle and front ones. On your right step on the middle one.
|
| Level 04 - Dark Woods of the Serpent (5 secrets) |

-
Through the bronze door, outside the door with a sign that says Do Not Enter there is a raised platform to your front right. Blow the small wooden door to find this secret. Inside on your left is a yellowish picture on the wall. Push it to stop the flames that shoot out inside the temple.
-
Through the gold door, kept to your right till you find a building with no doors. In the center are pictures on two sides. Jump through a picture to find this secret.
-
Through the red door, once you have blown the wall down with the tank blow the door on the other side of the large fallen log. Enter it and transport. Jump into the stream and go to your left. By the wall you can go under the water and swim to this secret area.
-
Jump up to the top of the waterfall and go down the stream past the large rock. At the end you will find this secret.
-
The flying carpet takes you to this area. By the yellow pillar control look down and to your right. You will see an opening in the wall. Position the pillars so that you can jump off the yellow pillar to find this secret. You can transport back to the top once you get there.
|
Full Game Episode
Code Of Honor
| Level 05 - Rising Son (7 secrets) |

-
Once the boat sinks, swim back to the big doors where you started at. Turn to your right and swim to the very bottom. Go into the cave to find this secret area.
-
Across the bridge, you enter a room. At the bottom of the ramp step on the table. Go NE and jump into the opening.
-
After you go through the water/pool, enter the building and go left. Go through the door and jump out the windows on your left. Jump up on top the waterfall. Bend down and go behind the fountain on the top to find this secret.
-
Jump off the waterfall to your left and go down the passage. You will see a gray wall in front of you and a gong to your left. Shoot the gong and the gray wall opens for this secret.
-
Jump back through the windows and go through the door on your left. Step up next to the statue and it will lower (this is needed for secret #7). Turn and go north down the passage. As you face the bronze keyed door, there are two torches on your left. Shoot the first one and open the wooden door behind it for this secret.
-
Through the bronze keyed door, there is a large brown picture on you right. Jump through it to find this secret.
-
Go through the next door, blow the barrels and go down the passage. You will come to the second statue on your right. You need to step up by the statue as you did in secret #5 and the statue will lower. The door opens behind the statue for this secret. If the second door is not opened, go back to the statue mentioned in #5. Both statues must be in the lowered position.
Note: Here is how to open the skull puzzle door.
Ok, you have a blue, yellow and red buttons on the floor, with a green and purple skull buttons on the wall. First combo is get the blue and yellow floor buttons in the down position and the red floor button in the up position. Now press the green skull button and the first door opens.
Second combo is get the blue and red floor buttons in the down position and the yellow floor button in the up position. Now press the purple skull button and the second door opens.
|
| Level 06 - Killing Fields (5 secrets) |

-
From the start, go straight and jump off the waterfall. Turn left at the base and walk through the vines for this secret.
-
Come out of secret #1 and go left down to the end of the stream. In front of you is a statue. Above it is a gong. Shoot the gong and go behind and to the right of the statue to find this secret.
-
As you are standing at the top of the steps facing the gold keyed door, turn SW and go through the archway. Blow the crack in the wall on your right to get this secret.
-
In the room that you find the gold key with the shooting arrows, stand on the ledge where you found the gold key. Look across the way and locate the second flag from your right. Get on top the flag across from it and jump onto the other flag. Grab the Nuke ammo on the ledge behind the flag. Good luck on this one.
-
Outside the silver keyed door, while you are in the water. Turn to the south and climb the steps. On the top platform turn to the NE and you will see an opening to the right of the waterfall. Jump to it the get the red armor.
|
| Level 07 - Hara-Kiri Harbor (5 secrets) |

-
From the start, jump out the window and go north. Turn left just before the red keyed door and go down the walkway. Blow the crack in the wall for this secret.
-
Go east through the archway between the bronze and silver keyed doors. Turn right and blow the crack in the wall that is to the right of the crates to find this secret.
-
Come back out by the crates mention in secret #2, and face due east. Across the water you will see an opening in the far wall. Go there to find this secret.
-
Come out of secret #3 and go NW to the far waterfall. Jump through the waterfall on the far wall to find this secret.
-
In the large boat that you find the red key in, jump to the waterfall to get this secret.
|
| Level 08 - Zilla's Villa (6 secrets) |

-
From the starting position, come down the steps and turn left. Turn left again and jump over the wall to get the rocket launcher. Go east down the walkway. Blow the crack in the wall on your right in the grass area to find this secret.
-
In the area that you locate the gold key, there is a large statue in a pond with two golden bird statues behind it. Jump on top the large statue and the left pedestal the golden bird is on lowers. Go in and get the goodies.
-
Through the silver keyed door, there is a large picture in front of you. Walk through it to find this secret.
-
Through the silver keyed door, go down the steps then up the other steps. At the top of the steps you'll find a gong on your left. Through the archway there is a fireplace on your right and a paneled wall to the right of it. Shoot the gong and the paneled wall opens to find this secret.
-
To the left of the fireplace mentioned in #4 is a picture with a candle on each side of it. Jump up and open the picture to find this secret.
-
Come out of secret #5 and continue north. You will see a red panel on your right and a grayish shield on the wall to the right of the red panel. Push the shield to open the red panel and find the secret.
Note: To find the bronze key, go through the silver door and down the steps. Go into the fireplace and turn around. Jump up and climb the ladder to find it.
|
| Level 09 - Monastery (5 secrets) |

-
From the starting position, turn to your left and walk through the large picture with the horses on it to find this secret.
-
Through the silver keyed door, blow the crack in the wall across from the red panel to find this secret.
-
Just outside the gold keyed door which leads back to the dojo, blow the crack in the wall for this secret.
-
Through the gold keyed door by the spinning blades, there is a picture on your right. Open it to find this secret.
-
Through the bronze keyed door, blow the crack in the brick wall on your right to find this secret.
|
| Level 10 - Raider of the Lost Wang (6 secrets and secret exit to level 21) |

-
From the starting position, go up the steps on your left and follow the walkway to the steps going down. At the bottom of the steps is a room with vines in it. Walk to the center pillar and turn to your left. Jump on the ledge with no statue and push on the back wall. The wall will open for you to find this secret.
-
Opposite the gold keyed door is a picture with a skull candle on either side. To the right of the steps is a button down low on the wall. Crouch down and push the button to open the picture and find this secret.
Note: Behind the bars is an exit switch that takes you to the Secret Level 21 (Shanghai Shipwreck). See the note at the end of this level for more info.
-
Through the gold keyed door, go down the steps, and as you start up the steps look to your left. Jump into the opening with the skeleton in it for this secret.
-
As you come back out of the silver keyed door, jump off the ledge and turn to the west. Blow the crack in the wall. As you start down the new passage look up on the gray wall on your right. Jump into the opening to get the armor.
-
Go back to the room that you found the silver key in. It is now flooded. Swim though the archway and go up through the narrow ceiling opening for this secret.
-
From secret #5, go back into the water and go east through the opening in the wall. Surface and find the golden bird on the pedestal. Jump on the pedestal and it will start to lower. Go to the bronze keyed door to the south. On the west (left) wall a pedestal will rise and a door up high will open. Jump on the pedestal then through the opening. You will be transported to some goodies.
Note: To raise the bars to the secret exit button mentioned in secret #2, go through the red keyed door. To the right of the tree shadow on the wall are some vines. Climb up to the top to find the button which raises the bars to the secret exit.
|
| Level 11 - Sumo Sky Palace (5 secrets) |

-
Outside the gold keyed door, push the far left gray panel to find this secret.
-
Through the red keyed door, there is a brown panel to the right of the spinning blade wheel. Hop on the spinning wheel and when you are in front of the brown panel jump off and push it to find this secret area.
-
In the hallway between the two spinning blade wheels is a red bench. Push it to find this secret passage.
-
After you climb the ladder, blow the crack in the wall to the left of the statue with the hands held up. Go into the passage for this secret.
-
Through the silver keyed door, you come to the lave area. Jump of the ledge to the narrow ledge on your right. Follow this narrow ledge behind the large building. In back off the building you will come to this secret loaded with goodies.
|
| Level 12 - Bath House (5 secrets) |

-
From the starting position, go east down the street. Follow it until you come to a propane truck with some female warriors on it. Kill them without blowing up the truck (very important). Go behind the truck and open the wall to find this secret. If you blow the truck you will not find this secret.
-
Blow the truck and go in the water. In the bathroom, open the right stall. Push the button in the stall to open the SE corner wall for this secret.
-
Upstairs you will find a Buddha statue. Blow it to find the secret behind it.
-
Opposite where you get the yellow key is a crack in the wall. Blow it to find this secret.
-
Through the yellow keyed door, is a dark gray wall in front of you. On your right is a hanging blue towel on the wall. Push on the towel to open the dark gray wall and this secret.
|
| Level 13 - Unfriendly Skies (7 secrets and secret exit to level 22) |

-
Right before the plane where you find the red key card, there is a pachinko machine with a switch on its side. Push the switch and jump up on the pachinko machine to find this secret door on the north wall.
-
After you have opened the red keyed door, go back to the room with the candy and pop machines in it. Jump on the candy machine and go through the opening to find this secret.
-
Go through the baggage claim ramp flap, and get on the conveyer. Follow it until you come to a switch off to the side of the conveyer. The switch opens the secret door (timed). Jump up, turn left, crouch down, and enter this secret area quickly before you are crushed.
-
In the Impulse Gift shop, push on the cash register to find this secret.
-
In the Blue Brew room, shoot the Chinese writing poster on the west wall. The secret door opens next to the poster.
-
Through the yellow keyed door, go to the control room. Get on top the vending machine and turn around. You will see a switch next to the radar control screen. Shoot it and the secret door opens behind you.
-
Go to the elevator which requires the red key. You must be on the upper floor. Open the doors first, then hit the outside switch to send the elevator down. Stand on the top of the elevator, hit the switch inside and let it take you up. Go into the duct and then finally into the Secret Level exit transport (the green moving slime). This takes you to Secret Level 22 - Auto Maul.
|
| Level 14 - Crude Oil (3 secrets) |

-
Where you locate the red key card on top a metal box, there is a small room off this room. Go in the small room and push on the shadow warrior computer screen. The metal box lowers to reveal this secret.
-
Through the red keyed door, there is a vent on the wall as you go up the ramp. Shoot the vent and jump in the vent to find this secret.
-
Through the blue keyed door, you will find a room with three heads in a water tank. Go to the desk and push on the computer screen. A door opens behind you for this secret.
|
| Level 15 - Coolie Mines (5 secrets) |

-
As you approach the blue key card, the wall to east blows open. Go into the lave flow opening for this secret.
-
From the volcano that came up, go down the east passage. When you come to the lava pool, on your left (NW wall) you will see lava flowing from the wall. Push on the wall to reveal this secret.
-
When you go down the elevator, you will come to another large drill on you right. Blow the crack in the wall behind it and jump through the opening to find this secret.
-
After you run pass the wild moving drill, start down the passage, on the east wall is a crack. Blow it to find this secret.
-
After you are blown up out of the air shaft and into the water, jump back down the right (eastern) air shaft to find this secret.
|
| Level 16 - Subpen 7 (5 secrets) |

-
Though the blue keyed door, go through the next door and turn east. Go through the big archway. Turn north and go behind the crates on the west wall for this secret.
-
From secret #1, jump up on the crates to the armor and turn east. Jump to the crates across the way. On the crates, turn NE and jump on the ledge with the red light for this secret.
-
From secret #2, turn south and go to the radar tower at the waters edge. Turn west and walk down this ledge for this secret.
-
By the second sub, use the deck gun on the ship to shoot crack in the wall. Go to the hole and on the left side of it (in the hole) you will find this secret.
-
By the second sub, climb the ladder and jump to the three crate stack. Now jump to the upper stack of crates with the nuke ammo on it for this secret.
|
| Level 17 - The Great Escape (6 secrets) |

-
Through the bronze keyed door, there is a drain pipe on the south wall. Climb the drain pipe to find this secret.
-
In the washroom, open the mirror for this secret.
-
In the room with the two beds, go to the SE corner of the room and open the east wall for this secret.
-
Just before the red key slot (where you put the red key in), there is a stairway leading up with a mesh fence along the side. At the top there is an outcrop straight ahead of you. Jump to it and swim down in the water to find this secret.
-
Face the red door switch on your right, push it and go though the first room on the right. Jump up on the small ledge and jump through the back right wall to find this secret.
-
In the room that you find the silver key behind the picture (it has the computer on the desk), Open the mirror for this secret.
|
| Level 18 - Floating Fortress (6 secrets) |

-
From the starting position, use the boat to jump up by the crates and hit the button. Jump up the crates and then jump to the other side by those crates. Jump up on the highest crates and onto the moving gate. Let it take you back into the wall and you will see an opening in the wall. Jump into it and blow the back wall. Shoot the button through the crack to open the door to this secret.
-
When you swim up through the square hole in the bottom of the hull of the ship, look through the window at the flooded compartment. You will see the large medkit in the lower part of the floor (this is where the secret is). Hit the switch on the small metal pillar sticking out of the water. Jump up on the crates, hit the override switch and duck. Now, you can go into the compartment and dive under the water (in the secret area) to get the large medkit.
-
To the left of where you find the blue key card, you will see a small opening in the lower part of the wall. Blast it a few times so you can jump down and get the goodies in this secret area.
-
JWith the blue key card, jump onto the ship and climb the ladder. Through the blue keyed door, climb the ladder and use the controls to move the turret to face the vent in the west wall. Go back outside and follow the small ledge towards the front (bow) of the ship. Jump onto the turret, then run and jump off the barrel of the turret into the vent for this secret.
-
In the lower part of the ship, find the locker with the name Davie Jones on it. Open it and then open the back wall of the locker to find this secret.
-
Through the yellow keyed door, find the control room. Go to the eastern side of the room and push on the computer screen. Run to the western side of the room, and jump into the opened control panel on the south wall to find this secret.
|
| Level 19 - Water Torture (6 secrets) |

-
Through the blue keyed door at the first turn in the blue hallway, open the east wall in the corner to find this secret.
-
Blow the glass out to flood the blue keyed area, and go into the room with the beds in it. Between the middle and right bed is a little cupboard open it to find this secret. Look in one of the vents for the red key card in this room.
-
Go down the red keyed elevator and hit the light switch next to the red keyed door. A circular pillar lowers behind you for this secret.
-
Take the yellow keyed elevator down and send it back up. A secret door on the east wall opens for this secret.
-
Through the green keyed door, find the control room for the gun in the water. Use the gun to blow the crack in the east wall (up a bit). Go back to the sub in the water and swim down and through the hole in the doors that you blew up with the gun too. Swim through the hole in the wall that you first blew up to find this secret.
-
Facing the end of level button, walk around behind it on the ledge for this secret.
|
| Level 20 - Stone Rain (5 secrets) |

-
From the starting position, turn around and go up the ledge. Keep going for a bit and after you go through a narrow pass, there will be a crack in the wall on your right. Blow it and jump in for this secret.
-
At the top of the ledge you will come to a temple. Shoot at the right tiger picture. A secret door to the right of the picture opens for this secret.
-
In the temple, go to the room where the Sumo boss is. Jump into the large painting on the back wall to find this secret (You must kill the Sumo boss to get the silver key).
-
Through the silver keyed door, go down the ramp. Turn right and go through the archway. Turn right again and go to the (red) room on your right. Push on the north wall to find this secret.
-
Once you have thrown the switch through the yellow keyed door, the volcano opens. Jump into this opening and get on the rope type bridge. Look down below you and you will see a nuke ammo. Push on the wall to your left to open the secret door and to find this last secret.
|
| Secret Level 21 - Shanghai Shipwreck (5 secrets) |

-
At the start, turn and jump through the waterfall to find this secret.
-
Through the red keyed door, jump up and push the switch above the fire. A door opens by the lava. Go in to get this secret.
-
From the tree that you get the silver key, face west and jump on the small ledge with the small medkit. Then jump into the dark opening for the secret.
-
Go into the lower room from the tree room. Opposite the lave pit is a ladder. Go up and push on the darken rear wall to find this secret.
-
After the lava, go up the steps and shoot the gong across the way. The wall to the west opens for this secret.
|
| Secret Level 22 - Auto Maul (6 secrets) |

-
When you come across four payphones, push on the third one from the left. The vending machine will open for this secret.
-
Through the blue keyed door, push on the computer on the desk and the filing cabinet behind you opens for this secret.
-
Go behind the red mini-car and go in the water. Go into the red light area and come out of the water to find this secret.
-
Go to the rear of the red truck and push on the blue wall. A secret door opens for you.
-
Turn off the lights in the waiting room before the garage. The bookcase lowers for this secret.
|

